I'm diving into an acoustic conversion with my son, and thought I'd share photos of our project as we go.
I had an old 12" Tom that we didn't have any use for any more...
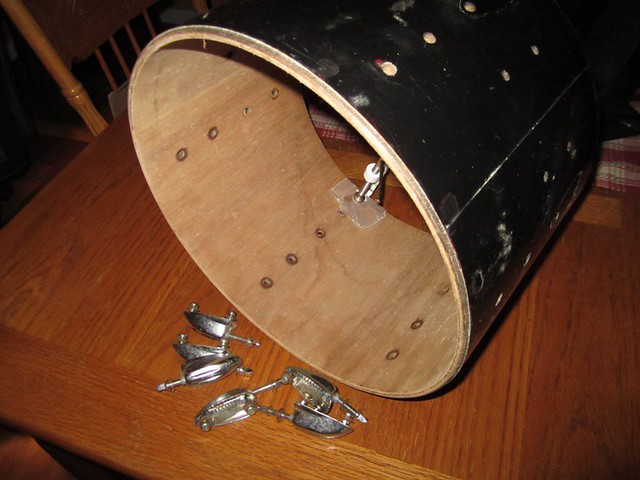
We removed all the hardware and metal parts, and I sliced it in half on my table saw. We then put black Gorilla tape along the cut edge of each piece to hide/cover the splinters from sawing (this is an old, very dry, drum)...
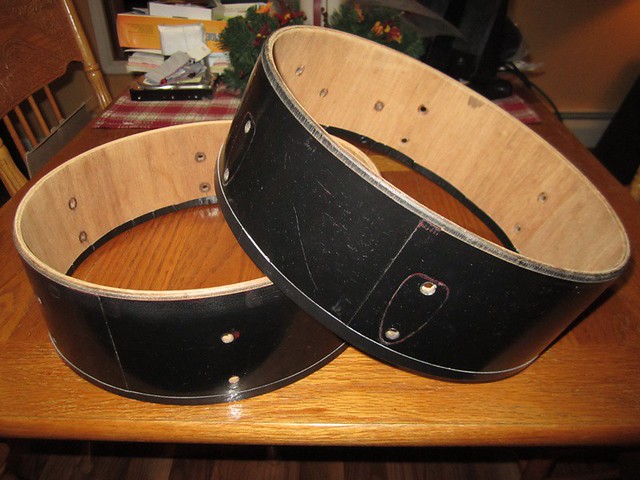
We then put white contact paper around the outside, covering the old painted sides (this was apparently originally a metallic red drum, that was painted dark blue). We wanted the white to contrast the black mesh head. We then put the hardware from the old drum on them (notice the lug mounts are different as they are from different drums, so we alternated lugs so both drums match!)...

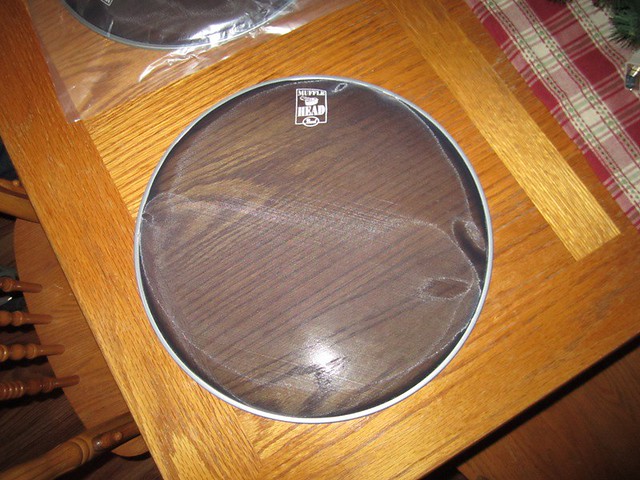
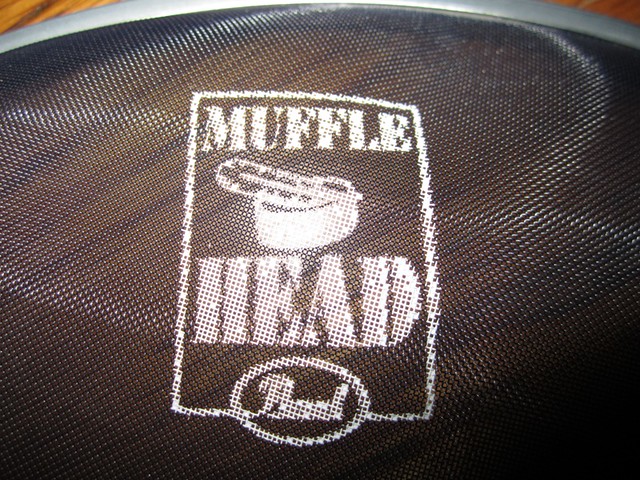
These are photos of the Pearl Mesh heads we purchased to try. They are "Muffle Heads", so I hope they work...
I'll post more as we continue the bracket and hardware installation later today...
OK, so now we started on the hardware & piezo assembly, after a trip to Home Depot... and receiving a package containing the TRS jacks...
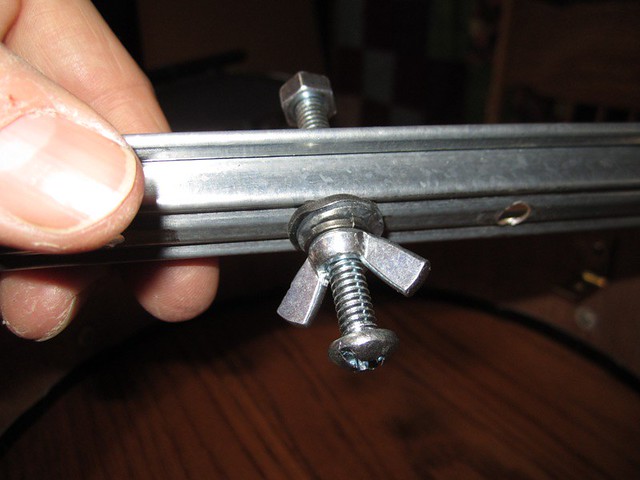
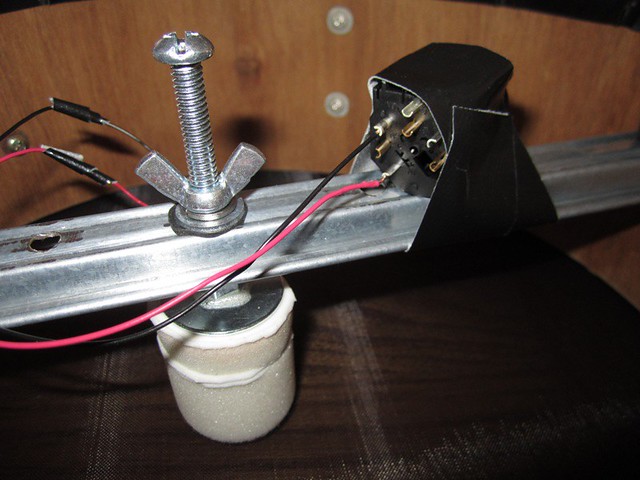
This is a close-up of the cross-bracket and piezo mount. I used a 24" drawer slide kit from Home Depot (around $3.50), cut into two 10 3/4" lengths, and drilled a small 1/8" hole about 3/16" from each end, to line up with the L bracket holes. Then I drilled a hole in the center, and one on each side of that, 1 1/2" away, in case I wanted to move the piezo off-center a bit. This is a 2 1/2" bolt, 1/4 x 20 thread, with a wing nut, lock washter, flat washer and neoprene rubber washer on this side.
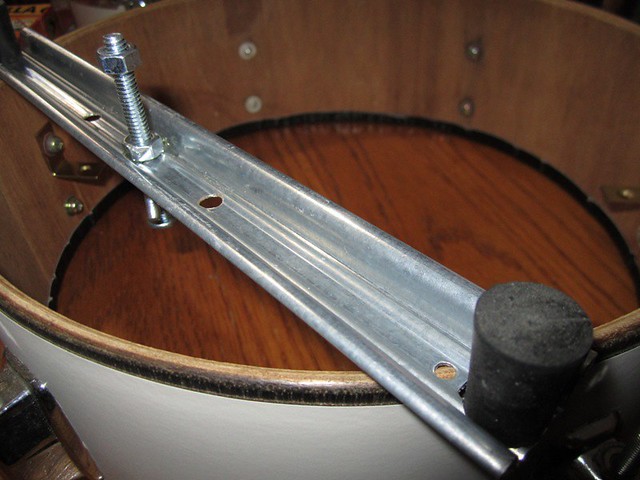
This is the top view of the cross-bracket and piezo bolt mounting assembly. Note the 11/16 x 1/2" rubber stopper which is held on with one of the wood screws that just happened to be in the drawer bracket package. The 1/4" nut is stuck to the bracket with double-sided sticky tape (you can stick it there any way you wish... I tried gorilla glue, but it did not work, then I tried solder, but could not get that to stick either...) It's just to hold it in place so you can adjust the bolt up or down to increase/decrease the pressure on the piezo "cone".
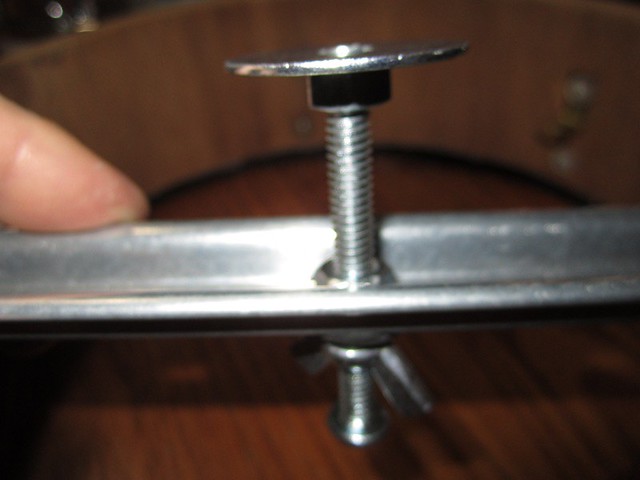
Now, I took a 1 1/4 x 1/4"flat fender washer, glued a 1/4" nut to one side, centered over the washer hole. This will screw down onto the end of the bolt, so it's OK if there is a bit of glue near the washer side, to stop the bolt from going too far through... although the double-sided tape will also block it a bit, when the piezo cone is attached... see below.
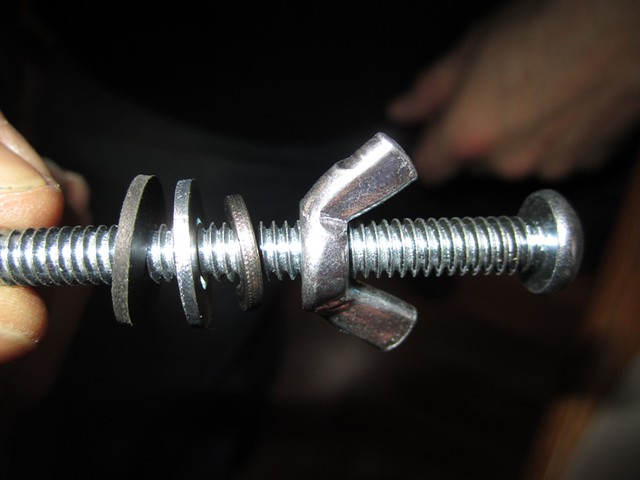
A close-up view of the bolt assembly... order is: wing nut, lock washer, flat washer, rubber washer. The bolt I used is a 2 1/2" 1/4x20, but I really need to shorten it to between 1 1/2" and 1 3/4" long... You will need to adjust the bolt length to fit your situation.
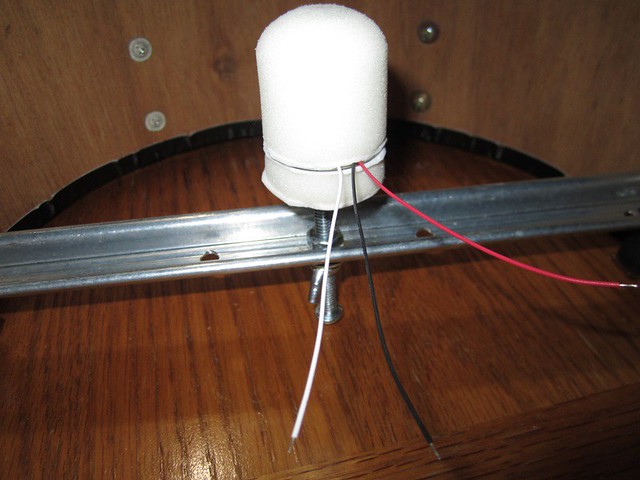
Now we built the piezo assembly... I bought a package of those small foam rubber paint rollers, that were about 5 or 6" long, two in a package. We then cut (with an exacto knife) it 2" from the TIP end with a hobby saw (made for cutting balsa wood), and then cut the plastic tube out of the center (which was the hardest part). We cut 1/2" off the bottom end of it, so we had a 1 1/2" top and 1/2" bottom piece. We then cut strips off the remaining piece and stuffed them up into the hole in the middle, to fill the center back up. The foam is completely soft from the top down to the piezo tape.
We then assembled it as: Top 1 1/2" foam, double-sided sponge tape, piezo with crystal side UP, double-sided foam tape, 1/2" bottom foam, double-sided foam tape. That assembly was then stuck to the 1 1/4" flat fender washer with the 1/4" nut facing AWAY from the piezo.
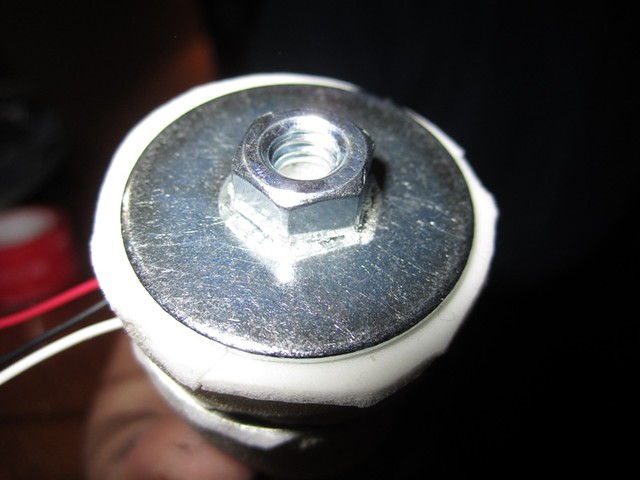
This is the bottom-side view of the piezo mount assembly. Notice that the 1/4" nut is glued to the fender washer and is on the side away from the foam and piezo assembly.
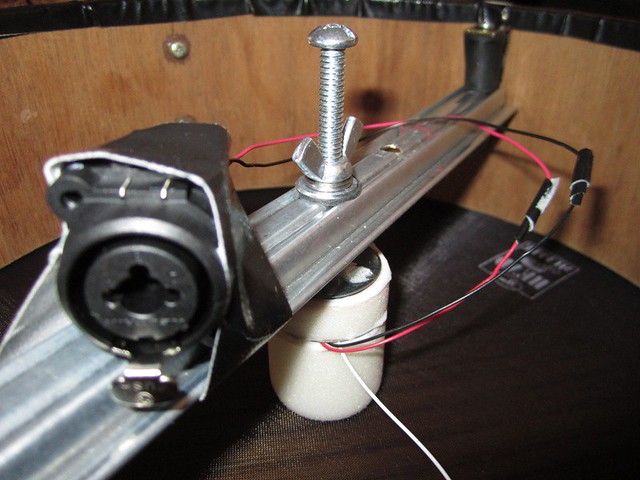
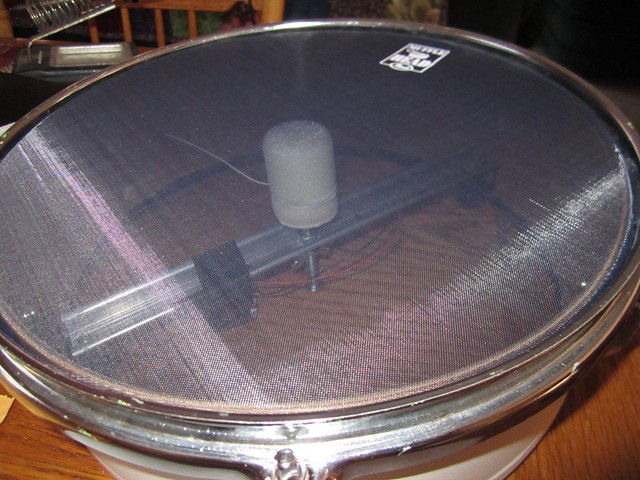
Here is the assembled e-drum, before wiring the piezo to the TRS jack...

Next, we soldered the piezo to a couple pieces of wire long enough to reach the side of the drum, and then soldered the black wire to the Sleeve and the red wire to the Tip. The second piezo will be attached as Black-> Sleeve and Red->Ring, for the rim trigger, but we'll do that after we get it working first. We are just taping the jack to the bracket for testing for now...
Here is the JACK side view...
Here it is... finished except for the rim piezo, ready for testing...
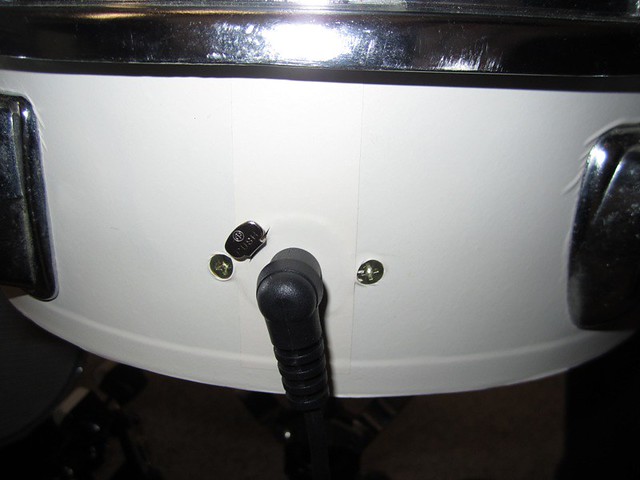
Here is a photo of the side, where the female TRS jack is installed...
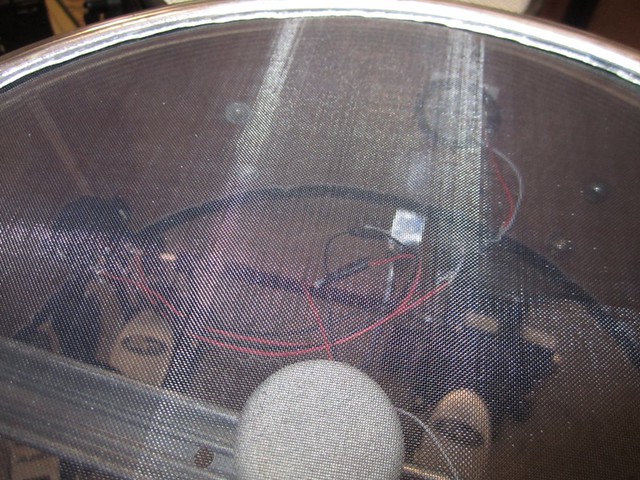
And finally, a top view showing the Rim Piezo and if you look closely, you can see that we've installed plastic tubing around the top rim, to protect our sticks from getting chewed up...
We plugged it into my SNARE trigger cable, and it works GREAT! The sensitivity over the cone area is a bit higher, but the sensitivity around the entire drumhead gets gradually less as you work towards the rim, but we can play the drum almost exactly like a REAL drum! There is absolutely NO interference to/from any other triggers, and banging on the rim has absolutely NO effect on the head trigger at all. I was so surprised and excited about how well it worked on our FIRST try, that I cannot describe it! LOL
Added 2/15/2011: PARTS LIST:Any old 12" Tom, cut in half top & bottom, with side & top hardware.From Home Depot:
1 pkg HD MR 200-2 4 Ultra Smooth High Density Foam mini paint rollers.
1 ea T6722122234 Drawer Slide kit for 24" drawers (not sure about part #)
2 ea 1 1/2" to 2 1/2" long 1/4" x 20 thread bolts with nuts
OR... 2 ea 1 1/2" to 2 1/2" long 1/4" x 20 thread thumb screws type P
(optional) 2 ea 3/8" cable clamps (no part #, sorry) (use if mounting to Alesis rack, not if using snare stand)
1 pack 1/4" SAE Flat Washers # 19821
1 pack 1/4"-20 Wing Nuts #19011
1 pack 1/4" Lockwasher Med. split # 32611
1 pack 1/4"-20 Nuts #08421
4 ea 11/16" x 1/2" black rubber stopper (sorry, no part #)
(optional) 1 pack 1/4" Flat NEOPRENE washers UPC 030699891887
4 ea Piezo with two leads. I used 35mm (three lead) from here:
http://cgi.ebay.com/ws/eBayISAPI.dll?ViewItem&item=110631595179&ssPageName=STRK:MEWNX:IT#ht_997wt_8942 ea Pearl MFH Mesh Tom Head for Rythm Traveler Drum 12 inch. I got mine from here:
http://www.amazon.com/gp/product/B003OXKA4Q/ref=oss_product(of course, you may get any 12" mesh head you prefer)
2 ea TRS Female Jacks with solder tabs (don't use the ones I used, they don't mount well... find ones that require smaller mounting holes.
1 roll 5/16" clear plastic tubing to put around the Rim, sliced lengthwise around the bottom inside of the natural "coil" of the tubing.
And FINALLY, a short video, showing the bounce and response of the drum, including both head and rim triggers... Please excuse the poor drumming and commentary, as it was not positioned well, and I did this in a hurry to get it done. See it here:
http://www.youtube.com/watch?v=oM3kluppkpQThanks, and I hope this gives someone some great ideas!
