Hello e-drum colleagues,
I am Gerdy and writing from Germany.
Please excuse my English and used terms I could not get translated.
If you are interested, the whole drum kit setup can be found here:
http://www.dmdrummer.com/index.php?topic=1539.0I did not mount the DM10 module right next to the Hi-Hat.
“I had to fight the black cable monster”…now including more cables and Y-adapters than before.
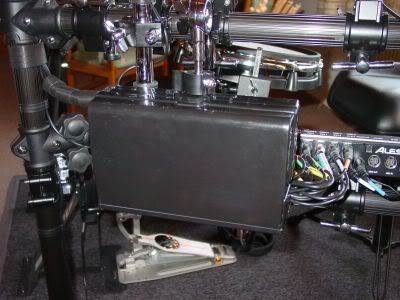
No, a DM10 module with black spaghettis hanging out of it was not mine. At first we release the cable monster from its shrink-on tube, and by taking a black coloured first aid box, we put it back into jail. (Had to laugh writing this)
The Hi-Hat cable and Hi-Hat-controller cable are separate.
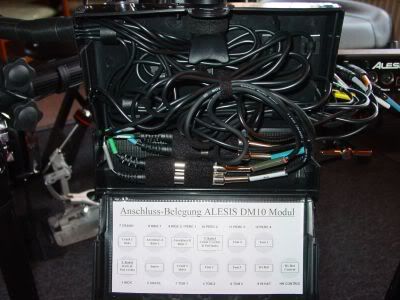
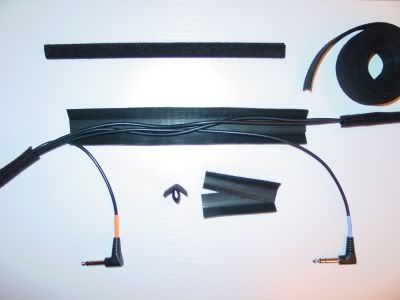
As you can see inside the new cable box, some self-sticking cable clips are attached to it.
Stripes of dual-sided Velcro tape work as “reusable cable ties”.
This allows us to shorten and lengthen the cables the way we want. And a new and helpfully module plugin-sketch fits also in.
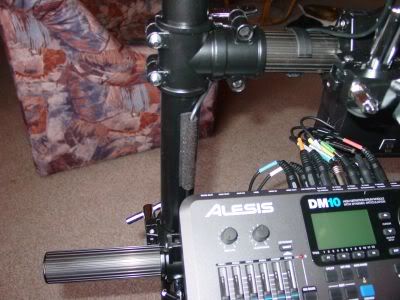
To mount the cable box onto the rack we can use an old and shortened cymbal arm.
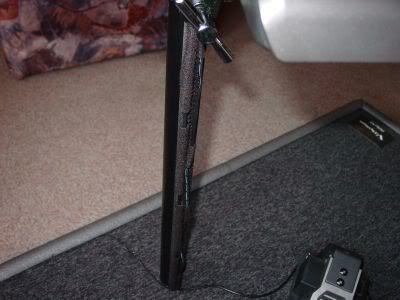
The outgoing cable bunch is wrapped with dual-sided Velcro tape. That makes the cable bunch more stable together with the cable box and looks nice on its way to the rack.
At the edge of our drum rack we use dual-sided Velcro tape as “reusable cable ties”.
Done ? No, we just got half the way.
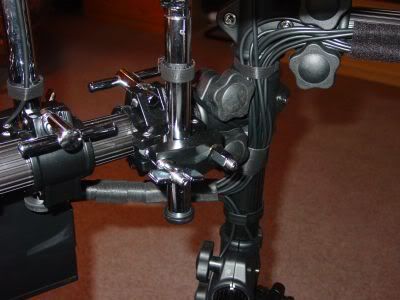
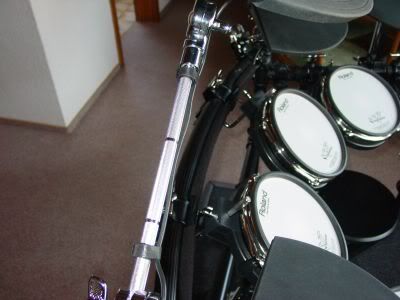
Let’s have a look to the central and curved rack pipe where the cable bunch comes along.
Are we satisfied the way it looks like ?
Are we satisfied the way it fits to the rack pipe ?
Are we satisfied the way we have to lay each single cable ?
Are we satisfied the time it takes ?
Come on, no we are not.
What we want is functionality…and a nice looking and easy to handle method.
At first we add some Velcro tape stripes to the central and curved rack pipe. In my case I used 3 Velcro tape stripes. Later on our cable bunches fit on it.
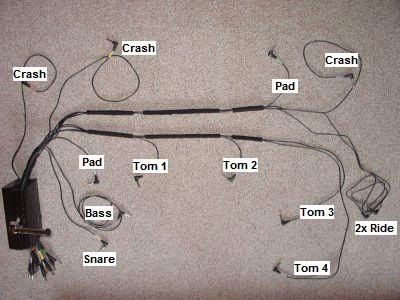
In the next step we split up the whole cable bunch and make 2 smaller ones out of it.
The first cable bunch is the “Tom cable bunch” including the cables Tom 1 to Tom 4.
The second cable bunch is the “Cymbal cable bunch” including the crash and ride cymbal cables.
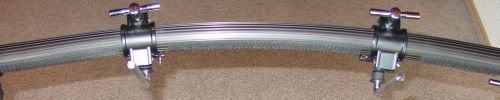
To keep the cable bunches together and to fit it later onto the rack pipe we are going to use “self-made dual-sided Velcro tape cable sleeves”. (Believe me, in German language it sounds strange too)
Use 2 stripes of the dual-sided Velcro tape (3cm wide) to build a sleeve. This sleeve can be opened and closed at any time and works as flexible wrap to the cable bunch. The length of each self-made sleeve is given by the length of the Velcro stripes you did on the rack pipe.
Now let’s fit the cable bunches onto the rack pipe. At first we attach the “Tom cable bunch” as bottom line along the rack pipe and plug in the Tom pads. If we notice some problems with the cable length, no problem, open the cable box and adjust the cable length. In our next step we attach the “Cymbal cable bunch” as upper line in the same way.


Hey, “Velcro tape fanatics”, does it look nice ?
Now our cabling works very well and it’s full of functionality.
The Hi-Hat cable is separate and attached with a small Velcro tape sleeve in the same way.
The Hi-Hat controller cable and the module power cable are also attached in that way.
Do you like an additional “Velcro tape session” ?
Yes of course, its tinker time and we are in the right mood to do this (luckily final step).
How about the cabling along the cymbal arms ?
Yes, it needs Velcro tape too.
We add some small Velcro tape stripes around the cymbal arms. Longer dual-sided Velcro tape stripes work then as “reusable cable ties”.
I swear to all broken drum sticks, after this ceremony we never touch Velcro tape again.
Well, and it could happen that you have to face a situation that someone does not believe you, that your drum kit is an e-drum kit because of the “missing” cables.
The advantages after the cabling modification:- The cable length adjustment needs to be done only once via the cable box, afterwards its status is permanent
- Easy Quick-mount /- dismount functionality
But the biggest advantage is this: You can get a more innovative and quicker procedure by changing the order during the drum kit set up or disassembling sequence.
Example “Set up”:After finishing the drum rack build up, you can immediately start with the cabling.
You have more free movement in doing the cabling because you are not hindered from pads and cymbals. Mount the DM10 module and the cable box, plug in the DM10 module and stay inside the rack to attach the cables around your position along the rack pipes and cymbal arms. You need only some plastic cable clamps (Hi-Hat, Snare, Tom 3 and 4, Bass) to finish the cabling. Finally you only have to mount the pads and cymbals and plug them in with “the stand by cables”.
You can do the reverse order for disassembling.
Ok, that’s it. Thanks a lot and with kindly regards,
Gerdy
